
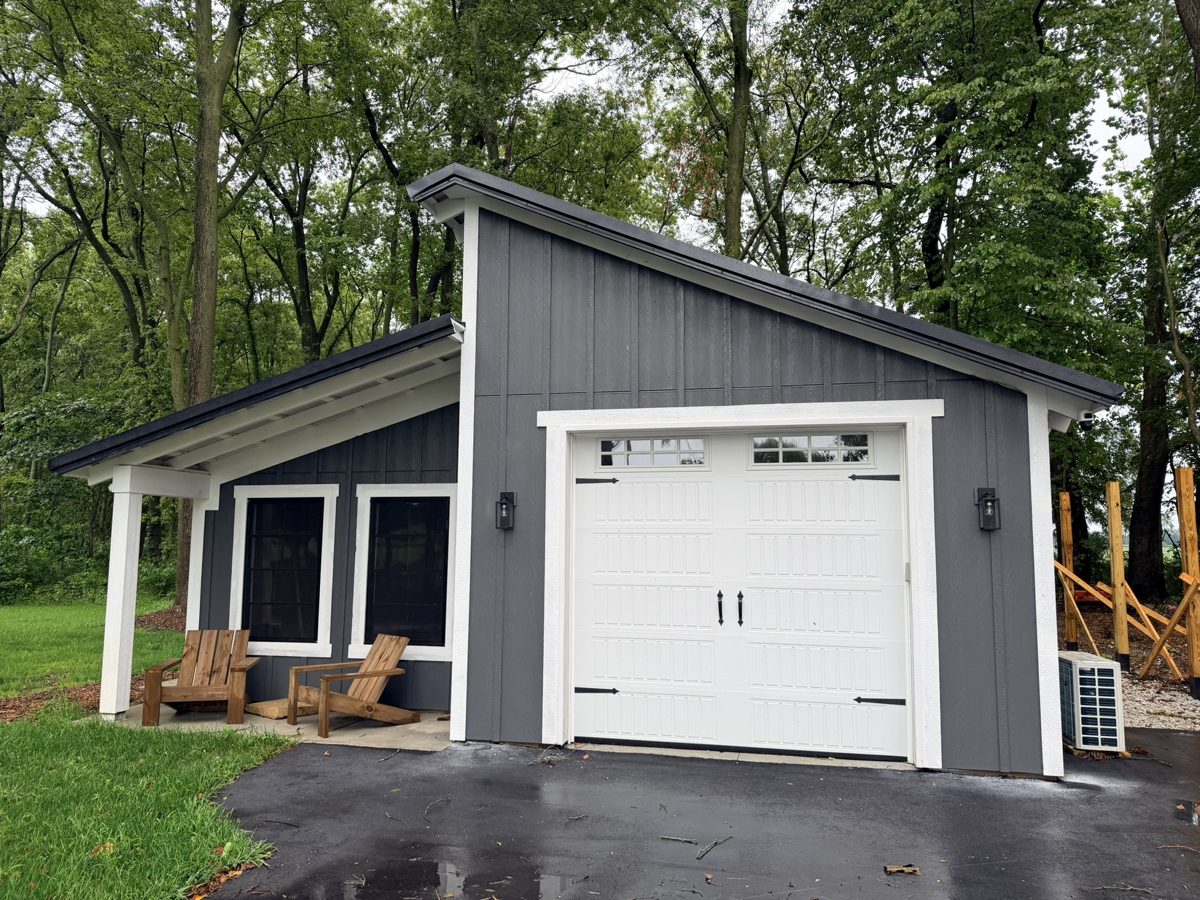
Last year, I paid a professional to roof my pole barn. I stood right there and watched them do it. But today, I'm doing the entire lean-to by myself, keeping $1,000 in my pocket.
If you've seen the last few videos, I framed it, put the rafters on, the purlins, exposed rafter tails. Today, we're putting the metal on the roof. Last year, I hired Daryl and the boys to roof my entire barn. Five guys, four hours, and about a couple thousand dollars later, they had it done. The lean-to is about half the size of what they already roofed. So, we have about a thousand dollars on the table that I want to keep in my pocket.
If you want to see how the pros did it last year: Installing a Metal Roof the Right Way. I went back and watched it myself at least once, maybe twice. So, today we're going to find out if all that watching paid off.
Final cost
To have someone install the roof, it would have cost me about $1,000. Instead, I paid $950. I did it myself.
Materials
- Metal roof panels with drip stop (10 panels)
- Foam inserts (closure strips)
- Roofing screws with the rubber gasket
- Rake fascia trim (two pieces, plus a piece against the building with the angle cut)
- Custom made drip edge trim for the gap between the two roofs
Tools
- Screw line marking tool
- DeWalt impact (my third one)
- Compact saw with the panel cutting attachment
- Metal snips from Lowe's (about $18)
- Hammer
- Tape measure
Drip stop: no vapor barrier needed
Everybody always wants to talk about metal sweating underneath. Not these. See this felt looking back? That's called drip stop. Condensation actually soaks into it. It vents straight out the roof. No vapor barrier needed. Daryl told me they used to lay down quarter-inch bubble wrap underneath the roofs to prevent the same thing from happening. Now it's all built inside the panel. And it helps from scratching.
Marking the screw lines
The panels overhang 2 inches. So that makes that first one 29 1/2 at center. My purlins are 24 on center. So, I don't need the tape measure anymore. Line up the mark, line up the crosshairs, and it puts punches on the roof where the screws go. Every panel the exact same way, which is what I'm looking for. I love that uniformity. Every panel has to go through this stage before it goes up.
The goal is to make sure everything's lined up perfectly so the panel never has to come back down. I got 10 panels total. So, I'm going to stage them all up here, get them all marked, and then we'll slide them up there and start installing. I'm not gonna eyeball it like Daryl. I'm not that good. And no second man needed. Four hits, and the entire screw line is marked perfectly every time.
Foam inserts
I'm on the front part of the barn. The roof above it has a ridge right there on the edge, and I'm going to mimic the exact roof up above it. The panels have those ridges, so I got these foam inserts that go down first before I put the panel down. We're putting them here, not on the leading edge like most people would, because we don't want wasps and whatnot, blowing snow and stuff, to go up into the building.
First panel and the leading edge
I remember from the first video where Daryl did it, he measured from here and made sure his measurement was the same on both sides. Here it's running about 2 and 1/2, which is perfectly fine. So, we'll run two and 1/2 all the way down the edge from start to finish.
One thing I didn't do: I didn't tap my screw holes on the leading edge. So, I'm about to eyeball those. It's not a big deal. It's probably the easiest one.
Setting the screws
You got to be careful here. You don't want to smash that down too much, because there's a little rubber gasket right there. If you smash it, you're going to have possible leakage. Not too tight, but tight enough where it's actually going to keep the panel in place.
I learned one thing about the drill. If you put pressure from behind on it, two hands on the drill, it puts those screws in a lot faster. And if you turn the speed up so it rotates faster, that helps, too.
The leg and the overlap
This is what they call the leg. This goes down and then that overlap on the other side goes over the top, and then we screw on this side. So it keeps it nice and tight and down. Very important to make sure that you do that right. Daryl actually mentioned that in the first video about how people screw that up.
Here's the glue underneath. Look, you just plug it in there like that. Don't stretch it. Just lay it out. Then measure the other side and make sure it's about 2 and 1/2, and make sure it lines up all the way to the top.
Where the screws go
I know there's going to be a lot of comments about where I'm screwing. A lot of people like to screw on the rib because they say the water's not up there. Problem is, the manufacturer says you got to put it there for strength of the panel from lifting up. So, if the manufacturer says that and you want to keep your warranty valid, you got to make sure you put it in the right spot. Tell me in the comments if I'm wrong.
Checking square
I want to measure from the leading edge to my panel, both top and bottom. We're off about 3/8 of an inch, top to bottom. Live with that.
The last panel and the cut
We have to cut one panel down for this roof. I got my compact saw here and I put this little attachment on. It's designed to cut panels such as this. Little wrinkly, real jagged though. Hey, you know what? That saved me a lot of money. If I have to, I'll trim it up, but I think the trim will actually cover it.
Rake trim
Now we're going to do that rake fascia board trim. It's two pieces, and then we'll overlap it with another piece up against the building with the angle cut. Luckily, I have a rafter already over here that I had extra that has that angle. Those snips actually cut pretty good for the money. I think they're like 18 bucks. Now, see that reveal right there? I want that same reveal the whole way up.
Drip edge between the two roofs
This special piece of trim is custom made for that gap right up there. We got to take the screws off the original roof, and we'll pry this underneath it. It's a drip edge. Covers the gap between the two roofs so it can't get back up in there. That's the lean-to roof.
What I learned
Watching it the first time, worth it. I learned how to leg my roof, screw and sheet placement. I didn't figure out any of that stuff. I just paid attention when someone else did it in front of me. Now, any roof in the future, I feel comfortable. I could probably do it myself.
Next time we're pouring concrete.
Related builds
- How the pros roofed my pole barn: Pole Barn Build on a Budget: Installing a Metal Roof the Right Way
- Hiring someone instead? How to Choose a Roofer: 5 Things I Check First
- How I built my pole barn: How to Build a Pole Barn: Costs + Full Guide
- Plans for a pole barn: Pole Barn 28x32 plans
- All my plans: homeprohero.net/diy-home-improvement-plans
28x32 Pole Barn Plans
The complete plan set from my real build. Two-bay layout, bookshelf girts, optional front and rear porches.