
You've seen me build the chair, the lounger, the sofa, and the tables. Today, we're adding to the set. This time, total relaxation. Adirondack chair.
Here's the deal. You can go buy one of these, and you're into it for three to $400. Three years later, it's wobbly, gray, and heading to the burn pile.
The other videos online, they built them out of 2x4. Not this one, it's built out of 2x6. I like things sturdy, bulky, chunky, whatever you want to call it. I want it to last. Just like all the other furniture I've built in the series. And we're going to build this for 80 bucks.
Plans for this exact chair: Adirondack Chair plans
Tools
You don't need a shop full of fancy tools to build the chair. I'm using what most people already have at home.
- Circular saw (or a miter saw)
- Speed square (I switched speed squares. I don't like that plastic one, I like the metal one.)
- Compact drill or driver
- A couple of clamps
- Tape measure and a pencil
- Caulk gun
- Eye protection and ear protection, if I remember to wear it
These are kind of more high end, I guess you can call it. You can get the same tool for a lot less.
Materials
- 5 2x6 boards, 8 ft (preferably pressure treated for outdoor use)
- 1 2x2 board, 8 ft (back support)
- Liquid Nails. Regular Liquid Nails is fine.
- #8 2-1/2 inch screws (a 50 pack)
- Sanding blocks
Cut list (5 boards, very little waste)
Like always, I use SketchUp to design my furniture, just like I did this one. I have a cut list, so I should have very little waste. Like always, we're always going to cut off the factory end, because it's never perfect.
- Board 1: 2 front legs at 19-1/2", the front rail at 24", one arm at 29"
- Board 2: lower back at 24", upper seat back at 32", the other arm at 29"
- Board 3: 3 seat boards at 24", where your keister will sit
- Board 4: 3 upper seat backs at 32". That's actually 8 foot on the nose. Luckily they give you maybe an extra half inch or so on an average 8 foot board, so you should have room. You could probably go 31 here if you're nervous about it. It's just going to make your back a little less high.
- Board 5: 2 stringers at 41" (3 ft 5 in)
- 2x2: back support at 35"
We're in the back of my DIY pole barn. This little porch area is killer for projects like this. That's kind of why I built it.
Step 1: Cut the stringers
These are the stringer pieces, probably the most difficult piece. I'll show you some shortcuts to get the angle right so we get the pitch of the chair right. I'll make it simple for you.
- First mark is an inch and three quarter on the bottom.
- Second mark is seven and a half down at the other end.
- Next mark, come from here, 3 ft 4 in, which is going to be 40 inches.
- Final mark is three and a quarter, from the top down.
We're going to make one of these, so then all you've got to do is connect the dots and cut the lines. Then take that mark to the very tip of the board, and cut it.
Then take the one we haven't cut yet. Copy the exact same thing by lining up both ends, trace it, and saw the pencil marks. Now you have two identical stringers.
Honestly, the stringers are the hardest part, and you just saw me do it. Pretty simple, you should be able to follow along at home. You don't think you can do it? The plans have the detailed drawings exactly how to cut that.
Step 2: Front rail
Hard work's done. Let's put the chair together.
First thing, get the caulk gun. Don't get me wrong, Liquid Nails is not going to replace screws. It'll prevent anything from ever wiggling again.
We've got our two stringers here, and we're going to attach the front bottom rail. All we're going to do is follow the profile of the front edge. That's fine if the front's dipped down just a little bit. That's what you want. You want the back level with the top. Put a little bit of Liquid Nails on it and screw it into the side.
The screws are really small. The reason why the head's small: once you sink them into the wood, they'll disappear. Within a couple months, you'll never see the head again. The reason why you use these over deck screws is the heads aren't very big and these won't split the board. I put three screws in almost every joint, just because you've got them.
Keep in mind, if you put too much Liquid Nails on, wipe it off with a cloth, because it happens. Countersink those screw holes just a little bit.
Step 3: Back rail
To make sure this thing's stable before you start putting the legs on, I need a 2 ft board, which is going to be this back rail. I'm looking at my plans and it says to put that front edge at 28. Liquid Nails first, then install it right there.
To make sure that's square, nice and straight, use the square. It lines up perfectly. You only really have to do it on one side. Now we're pretty sturdy.
Step 4: Front legs
Outside of the stringer cuts, this is probably the hardest thing to do, putting these legs on. Liquid Nails and three screws. Put the line on there, four and a half down, and line up the line. You want this just to be on the cut part, the front stringer. Once you get the first one, you're good to go.
Front legs are on. The bottom frame's done.
Step 5: Seat boards
Now we're going to put the seat boards in. We're going to set the back one first. Measure from the inside, 18 inches. I'll mark both, and it sits inside that mark. Three screws on both sides. We're not putting glue in here because it would be too messy. All you're doing is making sure the seat slat is level or flush with the stringer.
The next one goes up at the top. Butt it in up there as tight as you can get it. Then we'll measure the middle one and see where it sits. I'm just spacing it between the two. Just eyeballing it.
Step 6: Back panels
Put it on its face for now, and we're going to focus on the back seat panels. They go five inches up from the bottom. Draw a straight line. Liquid Nails in here is very important. It's going to be needed. Flush at the bottom, tight on the side. The two outside ones are the important ones. We'll come back and get those middle ones later.
Step 7: Arms and the back support
We're going to use clamps to set the height of the front arm. The arm just sits on the leg, and the back is held by the clamp temporarily. First, put some Liquid Nails on the top, and line the arm up with the front. Remember I told you about wiping that up? Get that cleaned up before it's too late. Then the other side. It's not too tough. It's actually a fun project.
Little Liquid Nails on the back, and here's our 35 inch back support. Make sure it's flush. It's not the same exact width, so go to the high side of that armrest. You can always adjust it later.
Now we tie all this in and make it nice and level. We need this to be a 90. You can see we're off a little bit, so we raise it up, and the back panels drop all the way back. Tight here, tight there. It's a perfect 90. The other side is a lot easier, since the first side's already square. It's going to come up naturally when I drop the back. Three screws and it's not going to budge.
Step 8: Finish the back
Flip it back upside down again. We put a board across the front and use the leftover 2x2 to help hold those boards while we screw them on. Make sure the bottoms are lined up. That's what matters, because if not, the tops will look goofy. Put the last one in the middle, so you can adjust it.
I'm building this in sections because it's just easy to follow along on the video. If you grab the plans, it's cake.
Some housekeeping: put some screws right in here to catch this board. It's sitting on the angle, so think about where it is. Then put a third one in there.
Did I not tell you these things weigh a ton? They're built like a tank. And that is why you build it yourself.
What it cost: $80
$80 all in. Compare that to the $300 you buy online. Likely junk. You'll have to replace it in 3 years. You're not replacing these.
Get the plans
The rest of the outdoor set
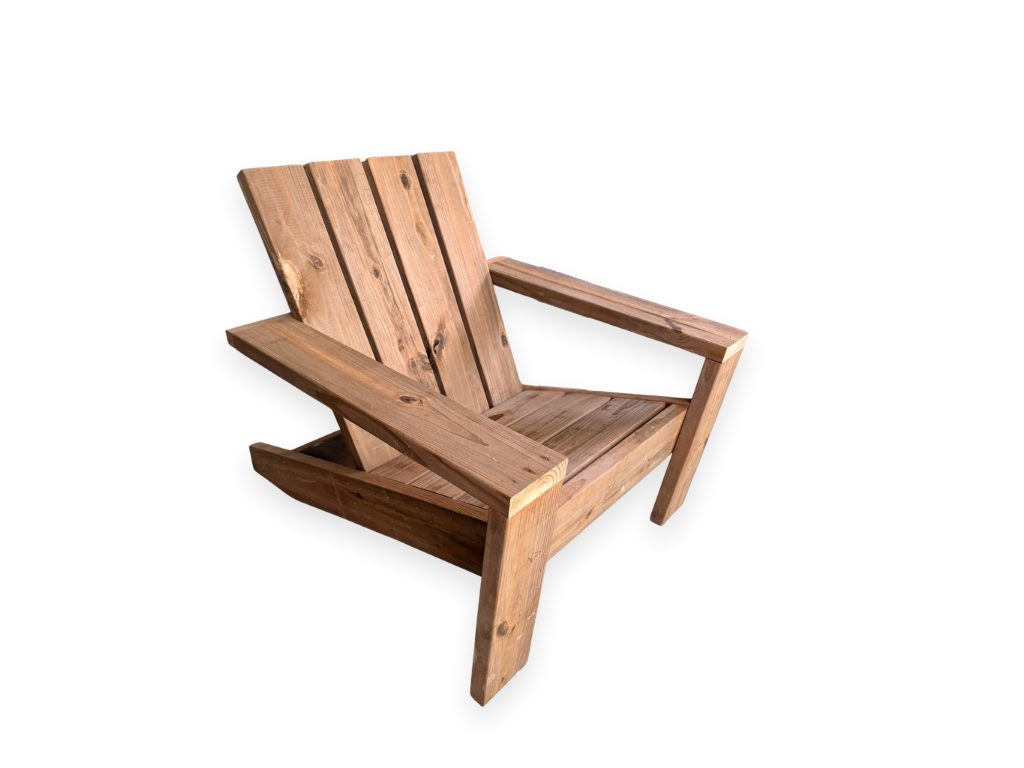
Adirondack Chair Plans
Skip the $300 price tag. A chunky, solid Adirondack chair built from 2x6 lumber.