
This area of my house is super dark at night. We're adding smart lights to my front landscape. I'll show you how to do it and how much it cost.
Why Wired, and Why Smart
So a couple years ago I did my own landscaping lights in and around the back portion of my yard, which looks great, and pretty easy DIY project. Now I'm wanting to add some lights to the front of my landscape.
When it comes to lighting, I prefer wired over solar for a lot of different reasons. One, they look better. Two, they're more consistent. And three, if the sun's not out that day, the lights are dimmer or stronger based on which ones got light and which ones didn't.
When it comes to the smart home portion of the project, it makes sense. My lights are programmed to turn on, and I also can control them from my phone or from switches within my house.
Most importantly, the lights are great for security reasons. With all that said, let's get to work.
Going solar instead? See my Garden Candle 2.0 solar garden light and the Garden Candle Post plans ($4.99).
What You Need
Let's go over what we're going to need for the project real quick. I bought everything on Amazon. Don't waste your money at Lowe's, Home Depot, even Menards. They're super expensive when it comes to the supplies.
The wire. I'm going with 10 gauge, which is super, super thick. 10/2 is what they call it. The farther you go, the heavier the wire needs to be. There's lots of different websites out there to tell you exactly how long you can run each type of wire. It's $168 for the roll, but it's 200 ft long.
The connectors. I went a little different than the last time. These things look really super cool and they're fairly inexpensive. Connectors at the store, 10 bucks for two. I think I got 20 for like 30 bucks.
The lights. We're going two different types. I've got these spotlights, two of them, to uplight my trees. And then I also purchased these deck step lights. I could only find them online, and that's why I bought them online, because I was looking for a particular width right here of an inch and a half.
The transformer. It's not that big black box you put outside that you see at the big box stores. It's indoors. I keep it all inside where it's nice and safe and not wet. All you got to do is add up all the watts of your lights and then make sure it doesn't exceed the amount of watts that this thing can put out.
The smart switch. The final piece is I'm going to tie this Lutron smart switch into my power in the house. We'll hook this up to the transformer and then we'll run our wires to our lights, which makes all the landscaping lights smart lights.
Materials
- 10 gauge (10/2) low voltage landscape wire, 200 ft roll ($168): Wirefy 10/2 Low Voltage Wire
- Landscape wire connectors (about 20 for $30): EDISHINE Low Voltage Connectors
- 10 deck step lights, 1 1/2 in wide: Landscape Deck Light
- 2 spotlights for uplighting trees: Landscape Lights 12V LED Spotlight
- 1 wired 30 watt spotlight for the flag: 30W Flag Pole Light
- Low voltage transformer (indoor), 120W: LED Driver 120W Transformer
- Smart switch: Lutron Caseta Smart Switch with Remote
- Hub: Lutron Caseta Smart Lighting Hub
- Short pieces of 18 gauge wire (16 would work too)
- Small copper crimp sleeves (about $5 for 50 at Lowe's)
- Liquid electrical tape: Gardner Bender Red Liquid Tape
- Silicone (to seal the hole into the house)
- Screws for the step lights
Tools
- Utility knife (the kind with a built-in wire cutter): DeWalt Push & Flip Folding Utility Knife
- Wire strippers
- Pliers or crimper
- Drill with a long bit
- Spade
- Screwdriver or drill/driver for the step lights
Step 1: Lay Out the Lights
So we're going to start outside here with the lights: place them, wire them, and then we'll run one wire inside the house.
When it comes to spacing, it's real simple. I got a little retaining wall. I don't have a ton of fall between the ground and the top cap, which isn't a problem, because the step lights are for steps. Most steps are 7 in.
I'm just going to go around to all the different areas and just mark center. I'm all about balance too, big time, so this all has to balance out almost perfect. Honestly, I want these spaced out quite a bit. I don't want to light this up like a Christmas tree by no means. Just enough to kind of accent the yard, to be honest with you.
Step 2: Run the Main Wire
All right, let's get that wire out. Man, it's heavy stuff.
Hey, check this out. They finally changed the design of a utility knife. It's pretty neat. If you want a spare blade, you keep them there. I think you put several in there. I've got one in there. But then when you shut it, it becomes a rope or wire cutter. Super easy to change the blade. You just lift up, boom, you plug it back in, boom. Pretty neat.
We bury the wire last, once we get all the lights hooked up. So I'm wrapped around the retaining wall. Then what I'm going to do at the end is actually tie in over here. We'll put a splice in there, and then we'll run this wire all the way to my house.
Step 3: Mount the Step Lights
The bad thing about these lights, and they're fairly inexpensive, but they don't come with the connectors to the wire itself.
So all I'm going to do is basically line them up, get them into the ballpark and screw them in. So easy. We'll connect the wires to the main line last. Make sure all these get in place right. Once again, got to find our mark, which is right there. Center it.
They give you anchors and connectors and all that stuff, like these little things, but I'm not using those. See, look how nice and neat those look. Looks pretty good. I like it.
Step 4: Run the Wire Into the House
We're kind of on a rain delay outside, so I ran down to the crawl real quick. This is the corner of my house that I'm running that low voltage wire to. I've got my long bit here. I'm going to drill a hole up here in the wood part, not here in the concrete, from the inside to the outside. That way I don't hit anything inside.
Pretty cool, isn't it? All climate controlled down here. It's really nice.
Step 5: Wire the Smart Switch and Transformer
All right, here's my box here. I did all this work yesterday. This is an electrical channel, so I'm not going to cover a ton here.
I got all my blacks for my power coming in, my power going out to another plug, along with the black on the switch. And then the blue on here, I'm not sure what that's used for, but it said cap it, so I did. The white on the switch ties into all the other whites that go to the different plugs, and then also the white that goes to the transformer. And then the black from the transformer is tied to the red on the switch. Pretty simple.
And then the output on the transformer is real simple: black and red, and they just go to the outdoor wire. It doesn't matter which side of the wire you put it on.
Luckily, in my jurisdiction, low voltage doesn't require a box. I'm going to go and smash all this stuff into the box, put the cover on, and I'll be done with this part.
Step 6: Test the Power
Okay, we got the power hooked up. Here's the line running from the house. Let's just make sure that everything works fine. Front lights, they should be on right now. Let's just see. Yep, they're on. Turn it off, boom, nothing. Okay, I've got the power off.
Step 7: Connect the Lights to the Main Line (My Fix for Skinny Light Wires)
I'm going to try and use these connectors here. This wire is so big. Let me strip these wires down, we'll plug them all together, and I'll show you a little secret I'm going to use.
Okay, I'm actually going to give these a bad review on Amazon. They work great tying into the 10 gauge wire, but the problem is the wires coming off the lights are really small. Maybe it's just the ones I bought, but I looked at the ones in the back and they were the same way. They're really skinny. It's hard as heck to get that wire right there to be centered in there where that little probe's going to hit it and lock it in.
So I had this 18 gauge wire just laying around the garage. I think 16 would work fine too, but anything less than that, 14, 12, may be too tight. 10's definitely way too tight.
So I'll show you what I did. I took a snippet of it like that. It goes in perfect, and then it's so tight that there's no way on earth that little probe in there can miss. Same thing with this side. Plug it in, boom. They're tight. They're not going anywhere.
And then this other end, I'll strip it down, boom, boom, and then what I did was I just twisted them on. Doesn't matter which one, it makes the connection good. I got these little copper, I don't know what they're called. I get them at Lowe's. They're like five bucks for 50 of them, and they're awesome, because all you got to do is put them on there and then smush them. So boom, pinch them. That's it. Now I'll trim up the end of it, make it look nice.
I did the exact same method when I did my backyard landscape lights and it worked fine. I haven't had a problem with any of them, to be honest with you.
We don't want them touching each other. I could use electrical tape here, but I like this liquid tape. It's pretty cool. I get it at Menards. I think it's everywhere. So you just put it on there, let it dry, and you hit it again, and it's usually pretty good at that point. It makes it nice and watertight. I mean really watertight compared to electrical tape. And if you look at the price of those waterproof nuts, no way, man. Those things are ridiculously expensive.
Then all we got to do is use this part and we'll just pinch that wire. The pinching of the wire works great with these clamps. Other than that, they're worthless. And then you smush it. You see it turned on and we're good. That one's working, so I'm going to knock out all the others. It's the best way of doing it. I'll show you when I'm done what they all look like, but I got a bunch of them to do.
It's a lot more work than what solar lights are, but the quality is 10 times better, and long term it'll last forever. Those solar lights, I don't think they last very long at all, at least the experiences I've had with them. But if you don't have access to power like I do, maybe you go solar.
Step 8: Place the Spotlights
So let's do the spotlight real quick. Pretty simple. They got a spike, you put it in the ground, and you kind of want to hide it. So with this, I'm going to go right up in here somewhere. You know what, it might look good right there. Let's just plug it in there for now. We'll adjust later tonight. Then all I got to do is tie into the main line like I did with all the others.
Step 9: Bury the Wire
Okay, the connections are done, they're all dry, we tested everything, everything works. I'm going to go and bury it all. It's nothing special. Whatever you can do to get it in the ground. It doesn't have to be very deep either. I've got a special surprise off camera for you that I'll show you tonight when it gets dark.
Okay, I got that all buried, looks pretty good. Now we're going to put this in the grass, which kind of sucks, but all you got to do is use a spade. Go down about 3 or 4 inches. There's nothing in the way here. I just crack it open like that, and then I'll put it in and then step on it. You'll never know it's there. Doesn't have to be deep.
I'll put silicone in that hole to keep the bugs out.
The Results
Let's see what happens tonight. Wait for the sun to come down and I'll show you how it looks. 3, 2, 1. I hope they turn on. Of course they're going to turn on, it's YouTube. Boom.
The setup of the smart switch on my system, the Lutron system, was super simple. Keep in mind you have to have the hub, which is relatively inexpensive. Then you can add as many switches as you want.
Remember the surprise? It's Old Glory. I put a 30 watt wired spotlight off the same system I just installed on it. It looks phenomenal coming up the driveway. I love it. Well deserved.
What It Cost
So how much did it cost? About $425. The majority of that is coming from the heavy duty 10 gauge wire I had to use for this project, because I was going so far away from my transformer.
It improves the safety and security of a dark spot on my property. It also increases my curb appeal, which increases my home value.
| Item | Cost |
|---|---|
| 10/2 gauge wire, 200 ft roll | $168 |
| Lutron switch | $52 |
| Transformer | $32 |
| Deck lights | $105 |
| Spotlights | $24 |
| Misc | $44 |
| Total | $425 |
Time: about 4 hours.
More Projects and Plans
Thanks for watching. Take care, and I'll see you next time.
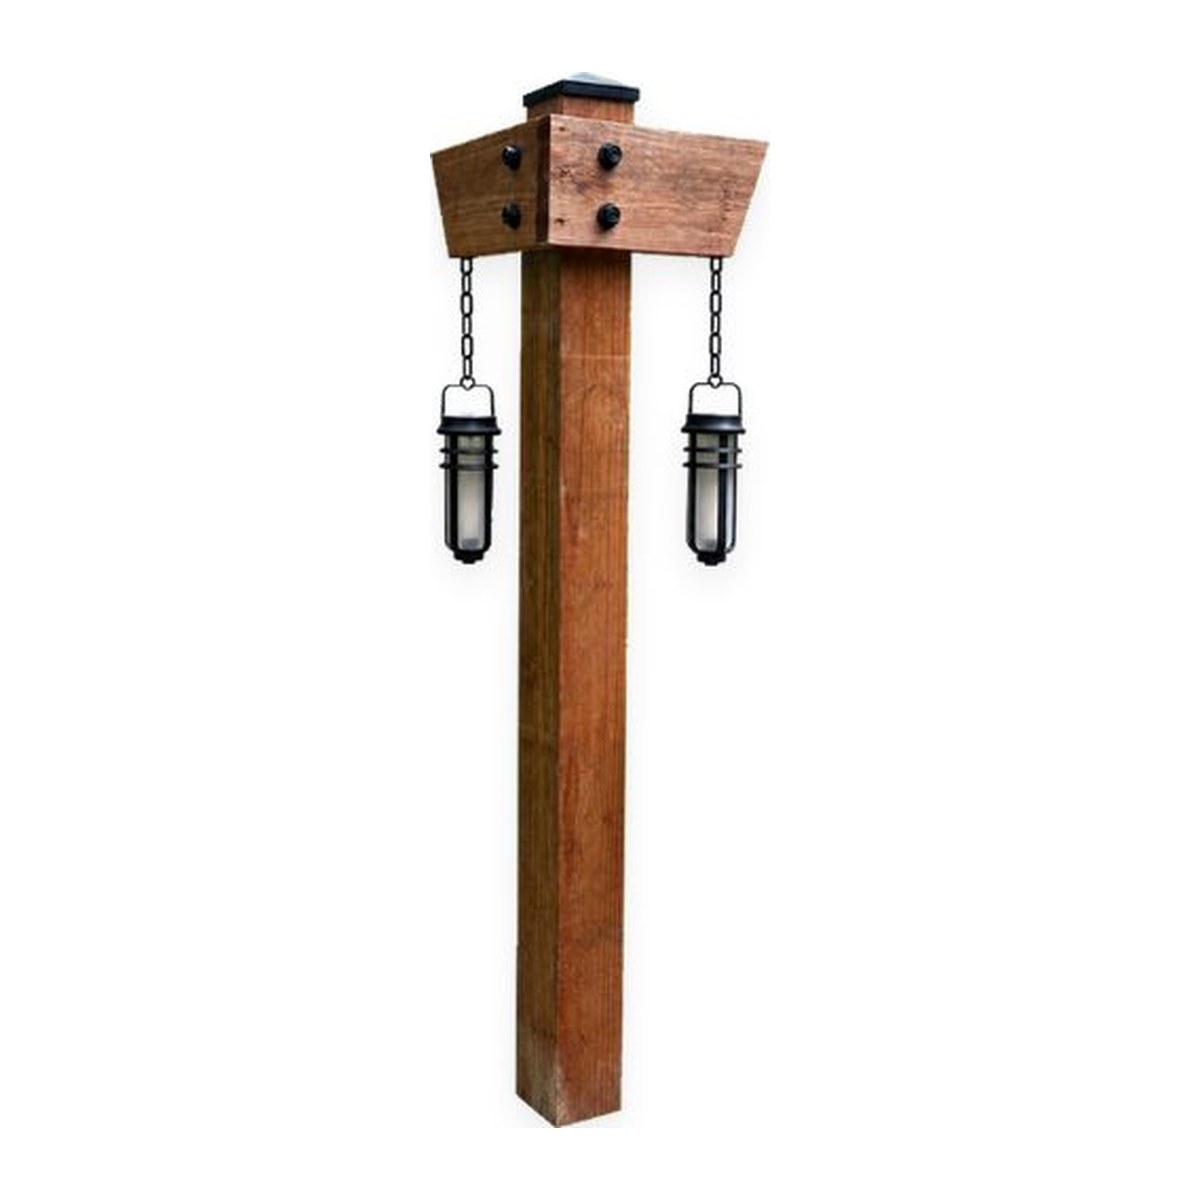
Garden Candle Post Plans
A 6x6 post with angled arms, hanging chains and solar flame lights. No wiring.