
Big day, we're pouring the concrete on my 28 by 32 pole barn. I hope I DIY-ed everything right. We're about to find out.
Where the build is at
Video one, posts and foundations. Called the pros in, got it nice and square. Videos two and three, we added headers and rafters, which was hard on the old body. We moved on to the framing, commercial bookshelf framing. I love it, most people loved it, a lot of people didn't. In my opinion, it's the best way to go. We put half inch OSB around the outside perimeter of the barn. Then we added the very popular exposed rafter ends. Moved on to the siding in video seven, fiber cement, board and batten style.
Now I'm calling in the pros again to put the concrete floor in and to lock my posts and the barn all together. Not only in the barn, but on the porches too.
The prep I did myself
I can tell you right now, I saved some big time money by doing my own grading with my tractor. I brought in a load of gravel. I used the buddy's compactor. I compacted everything down a ton. I used my Huepar laser to give me a pretty level base. I think my contractor went from 950 square foot to 550 square foot because I did all the grading myself. I've got about six to eight inches of gravel I compacted long before they came.
This is a pretty small concrete job around here. I had a hard time finding a concrete contractor that would actually consider doing the job. I didn't know this contractor and he was available in three days.
Three areas
- Back patio: I think it's 8 by 16.
- Front patio: about 4 foot out from the posts, 16 long also.
- The inside of the barn: it's supposed to be a 28 by 32, but it's not quite that with the porches.
They set forms with 2x4s and pins. They put a quarter inch of fall on the porches over 10 feet. Inside the building, no fall at all. I told them not to, it's covered.
Why the porches
I've had a lot of people ask me about the porches. Why did I do that? Or I wasted valuable inside space. That's fine. I'm not looking for a big bulky square pole barn. I wanted something a little different that stood out from all the other pole barns in my area. I was willing to sacrifice to make it look better.
My one mistake
I did make one mistake though. My cedar garage door legs are too high. They're going to be an inch underneath that with concrete. I'll have to come back later and put treated in there, which is perfectly fine. I didn't want the water to wick up into the cedar. But when I got more gravel and brought my gravel level up, they could have made that all work. That's totally on me, not them.
Materials
- 12 yards of 4,000 PSI concrete with fiber (two trucks, six yards each)
- No wire, no rebar (not needed where I live)
- Gravel base, six to eight inches, compacted
- 2x4 forms and pins (the crew's)
Tools (my part)
- Tractor for grading
- Plate compactor (borrowed)
- Huepar rotary laser level for a level base
The pour
They started from the back and worked their way to the front. The back corner meant wheelbarrows, and I paid a little extra for that. They had the driver do a blowout, dump as much as he could as fast as he could, to project it into the area they needed, and that cut the wheelbarrow time. Once they got toward the front, the truck could pour right in.
What they do is they set those outside edges, and then they screed it with a 2x4. That makes the center nice and level with the outside walls. Then they come back and bull float it. That brings the cream to the top so you can finish it later.
Interesting enough, they couldn't wash out directly onto my ground. They have to have a piece of plastic down or some type of container. So he washed out inside of my bucket.
It's kind of nice sitting back, watching them work hard. I'm paying for it, literally. But no way on earth I could do this by myself. Sometimes it just pays to add the pros. Save up your money and you just pay the bill.
They left me a spot for my garage door to go down and tuck into the concrete floor.
The finish
I told the guys I wanted a semi-smooth floor on the inside of the pole barn, but on the porches I wanted a broom finish with edges and control joints cut in. Inside, they came back the next day and saw cut the control joints in the bays. On the porches, I definitely wanted that broom finish with the cleaned up edges. We let it dry for 10 days.
What it cost
It's a total of 12 yards at 4 inches thick, with fiber, about 450 square feet.
- Concrete (paid directly to the truck drivers): about $2,400 (the cost card in the video: $2,375)
- Labor (5 guys): $2,800 with a generous tip
- Misc: $25
- All in: $5,200, about 4.5 hours
I think it's a fair, honest price and the job quality looks great.
More from the pole barn build
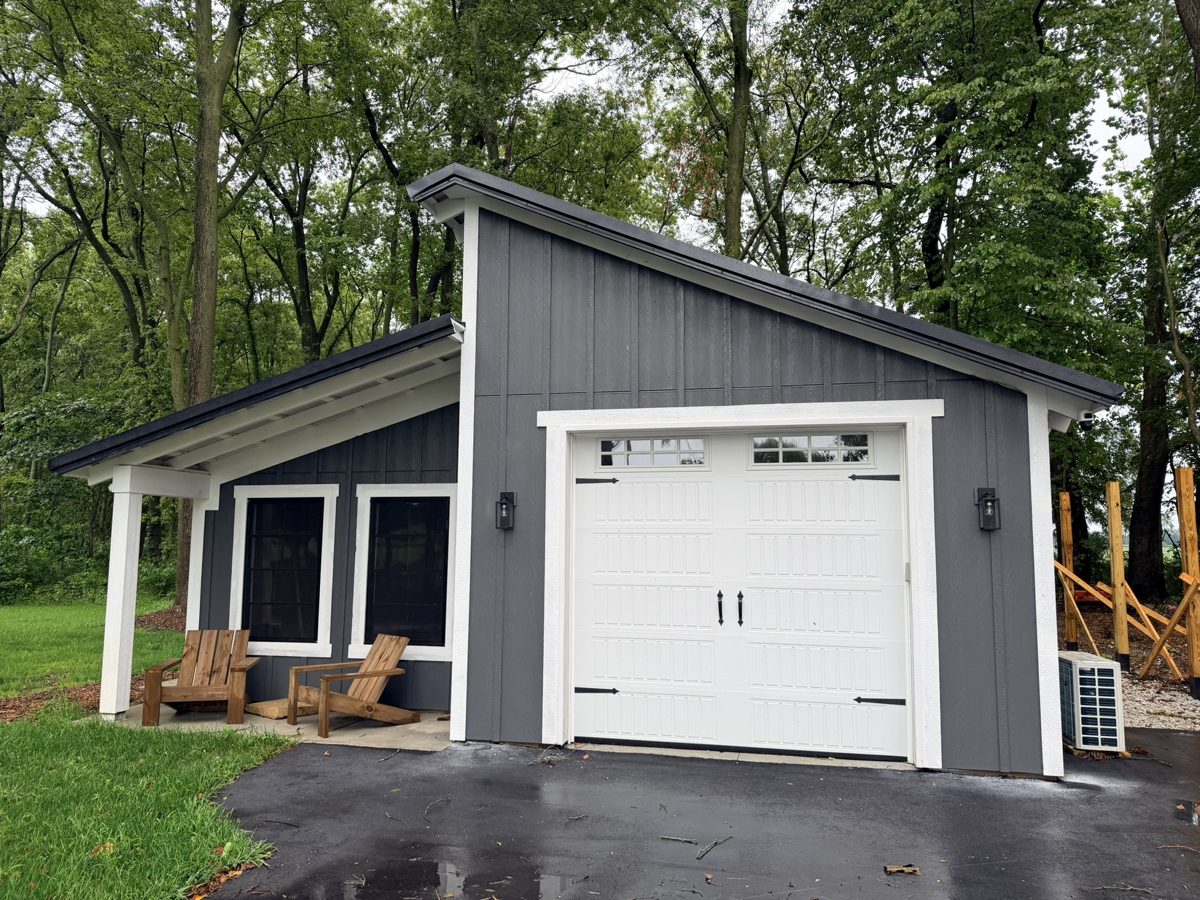
28x32 Pole Barn Plans
The complete plan set from my real build. Two-bay layout, bookshelf girts, optional front and rear porches.