
24 feet of lean-to roof, all the rafters, purlins, overhangs, and exposed ends. You need a crew for that? No. I did it by myself and I did it under 4 hours.
If you've been following the lean-to build, we set the posts a while back and did the framing in the last video. Today we're framing the roof, and I'm going to do it all by myself without the help of anyone. To make it fun, we're going to throw a clock on me to see how long it takes.
Two things to get right before you cut any rafters
Before I cut any rafters, there's two things I have to get right. One is the pitch of the lean-to. And two, how the lean-to is going to actually tie in to the existing 28 by 32 pole barn. You get either of those wrong, it's going to scream addition, add-on, whatever you want to call it. Or two, you're going to rot the building that it's attached to.
The pitch
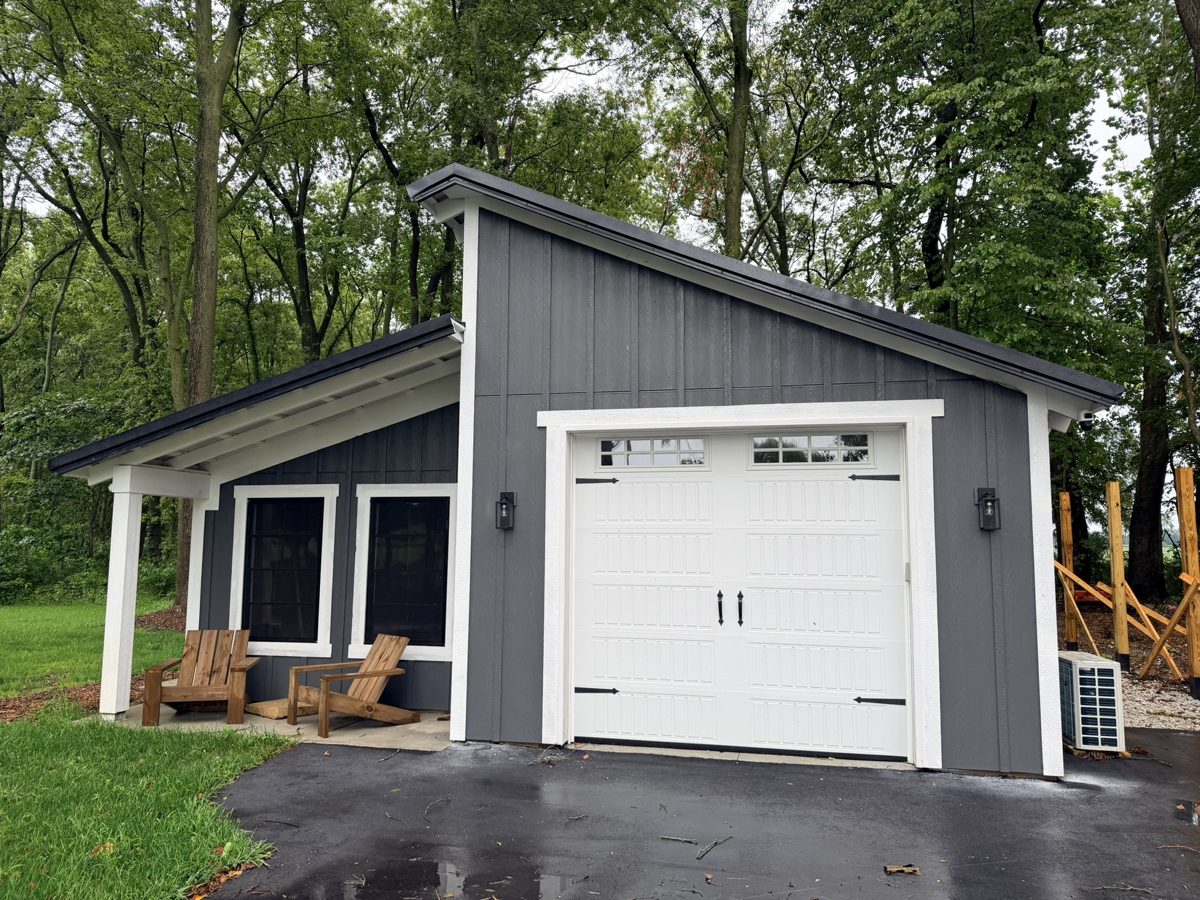
I'm running a 4/12 pitch on the lean-to. Not because 4/12 is a magic number. It's simply you want to match a pitch that's already on the building. In this particular building, I've already got a 6/12 pitch up here. But on the opposite side, I have a 4/12 pitch, which will match that side with this side. It should look really good, balanced, and clean.
The tie-in
So how am I going to tie it into the building? It's real simple. These rafters at a 4/12 pitch will actually be at the bottom of the white. I'll slide the roof underneath the lip, a little bit of flashing, and we'll be good to go. And we're actually going to mimic the exposed rafter tails on the lean-to too.
You want all the details on the main structure, the 28 by 32 pole barn? It's like 50 pages long, color, all that good stuff. It'll help you understand how I built it: Pole Barn 28x32 plans
Materials
- 2x6 rafters (20 of them), 2 ft on center
- Rafter hangers
- Screws for the hangers (I know you're supposed to use nails here; see Step 2)
- Nails for the rafter seats
- 22.5 inch spacer block (the width of the R19 insulation going in the ceiling)
- Purlins, with a 12 inch overhang and staggered seams
- OSB for the barn wall behind the exposed tails (7 ft panels)
- 2x10 header on the building for the exposed rafter tails
- 2x8 rafter tails, 18 and a half degree angle, about 14 inches from the tip to the straight cut
- 19 1/8 inch spacer blocks between the tails
- 1/4 inch by 3 inch structural screws ("basically lag bolts, like modern day lag bolts"; they come with a drill bit)
- Deck screws
- Fascia boards and drip edge
- Flashing at the barn roof
Tools
- Miter saw on my mobile workbench
- Johnson pitch slope locator
- Huepar laser level (the beep tells you when it's touching)
- Level
- Kreg Rip-Cut for the OSB
- Nailer and drill/driver
- Ladder
Step 1: Cut the first rafter and make it the template
The first rafter is the most important rafter. If my angles are off on this first one, I'm off on the next 19. We're putting 20 up today. Got to make sure this one's on the money. We'll dry fit it, make sure it looks good, and then we'll make exact copies of it. Got the 18 and a half, which is a 4/12 angle.
So the first thing I need to do is make sure we're plumb coming up the wall here. We're going to make a mark right there. That's where our first rafter will actually be, the outside edge of it.
Step 2: Rafter hangers (and why I used screws)
Now we're going to have to attach the rafter hanger I bought on the end of the angle. Not necessarily needed, but it makes it a heck of a lot easier when you're screwing them into the barn. Hey, I'm using screws. I know you're supposed to use nails here. I'll be honest with you, I've had more problems getting a screw out than ever a nail.
I got this little Johnson pitch slope locator. It's kind of handy. That's like a perfect 4/12, so not off by much.
We have the rafter in a pocket, but we are actually going to cut the tail off this for now, flush, plumb, with the wall itself. Don't panic. We're going to put exposed rafter tails on just like this part here.
Now the big question is going to be, does that fit down at the other end the same way? I'm off just a tad bit right here, but if I push it with my thumb, I can push it out that much. That's where we need to be. Our template's good. Now we got to make a bunch of them.
Step 3: Cut and set the rest of the rafters
These are 2x6s. The top edge gets a 4/12 plumb cut. The bottom end, a 4/12 seat cut on the top plate. Plenty strong enough for the snow load in Indiana. No tail, no overhang yet.
This one will set the field for the rest of them. Two foot on center. All I'm doing is making sure I can feel the wood level with here, and then I'm making sure the wood is on the plumb mark. Then I got a 22.5 inch block, which is actually the width of my R19 insulation I'm going to put in the ceiling. So we're going to move right down the line. All the uppers done, and then we'll adjust the bottom ones.
This header's pretty level, so if I stay with the bottom of my rafters at the bottom of this, it should be real level. I did have to actually tie in two of them at the tail end. What I ended up doing is toenailing those into the header up there. Down here, I put the same space that we put up there, and that gives me my spacing. Two nails on the non-block side, remove the block, and two more nails.
All the rafters are up. The clock says 1:23.
Step 4: Purlins and the tuck under the barn flashing
The purlins have a 12 inch overhang here. I cut them on the seam, stagger the seams and move right along. Just push it up against the roof.
My roof's going to tie into this flashing up here. So when I put a piece of roofing on top of here, after I put the purlins on, you can see how it tucks under there real nice and neat like that. It's going to leave a little bit of a gap here, so water will come off here, onto here, and down it goes.
Okay, purlins are done. The clock says 2:17. Pretty straight up there. Unfortunately, we had a casualty. I dropped the nailer from up top and it broke the slide. There's a replacement part, about $80 or $87.
We stop the clock there because I have to put the OSB on the barn wall first before the exposed ends, and that's not part of this project. They're 7 ft panels, and I used the Kreg Rip-Cut to make it real quick. It's fast, the exact same cut on every panel. No measuring, especially when you got the same panels at the same height.
Step 5: Exposed rafter tails
We're using a 2x10 on the building itself, and then 2x8 rafter tails. The reason why we're using 2x8s is because every rafter on the outside of this building is a 2x8, even though the inside rafters may be 2x6 or 2x10. I want the same consistent look. We're going to put an 18 and a half degree angle on it, and it's about 14 inches from the tip to the straight cut. I cut them up on the mobile workbench with the miter saw.
I did use ChatGPT to actually help me space this. If you know anything about spacing, it gets kind of confusing sometimes. ChatGPT told me to get a 19 and an eighth block that I'll put in between the two rafters, and that sets up the spacing perfect.
First one up. Remember, it's upside down. We put one deck screw here, then the quarter inch by three inch structural screws. They'll really hold it tight. To mark our next one, I use our spacer block and put a line right where that ends, so our next one will start right there. Line it up and continue where we left off.
I don't think I've seen anyone on YouTube do this look. It takes a lot more working time, no doubt about it.
The money shot: a little bit of a lip, about a sixteenth of an inch. We'll take it.
Step 6: Purlins on the tails
I'm coming off the other purlins and dropping down an inch and a half, because that's what the purlin needs to sit on top of here. I've got a block in here to keep it up there until I get it level, and a cheat sheet down here. I want the touch there, and I want that gap gone there. Tight, then we screw it.
I put the Huepar level up there. It makes you feel good when you get that beeping noise and that's touching. Look, the Huepar level told us it was high: that purlin's not touching that 2x6. Fix it, run a level across, and hopefully we have the same touch points on the other two sections. Screwing into that header behind it, so it's plenty of meat. Six to eight per eight-foot section, straight into the header, and wherever I can see a rafter, I hit it.
Step 7: Leading edge purlin, blocking, and fascia
Once we got the exposed ends on, here's the leading edge purlin. This is the most important. It travels all the way down from one end to the other. We want to make sure we got the exact same overhang, 12 and about an eighth. That way, we can run a line, cut all these off even, and have a nice straight overhang. This will get a drip edge across it so you won't even see it.
The other purlin goes right along the edge and hits the OSB. The reason why: you want that blocking so you don't have to worry about things getting inside your lean-to. I put this one flush on the outside rafter, so that one goes into the rafter and this one goes into the header.
Then the fascia boards: 18 and a half because we're 4/12, remember? I was fighting a rainstorm with two boards to go. I cut a little groove in the metal up there, and it went right up to the top.
Stop the clock: 3 hours and 58 minutes
Stop the clock. All the rafters, purlins, overhangs, fascia boards and the exposed rafter tails in 3 hours and 58 minutes. I still had two minutes to spare. You tell me, did I need a crew to do it and pay them for it? No, and you don't need one either.
I likely saved 75% of the costs if the pros did the framing.
Next up
In the next video I put the metal roof on it by myself: Paid a Pro Last Time, This Time I Did It Myself: Lean-To Metal Roof
More from the pole barn build
28x32 Pole Barn Plans
The complete plan set from my real build. Two-bay layout, bookshelf girts, optional front and rear porches.